The best builds for each operator and the squads that run them: nine builds and three squads, each checked line by line against the game's own trees, weapons and items. An operator can earn 24 focus in a campaign, which is less than one maxed line on top of anything else, so a build here is the order the focus is spent in, not a finished tree. Every one opens in the build planner with its ranks, weapon, mods and utility items set.
Which specialization, operator and blaster each of these leans on, and why, is argued out on the tier list.
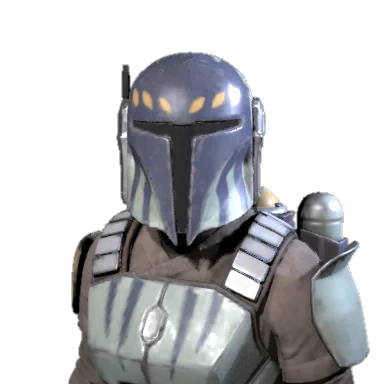
Heavy is the only specialization that taunts. Bulwark taunts everything in an area for 4 Advantage and raises Defense for the turn, and Intimidating Posture, which every Heavy starts with, turns each blaster hit into a taunt on that target. Trick takes the role because For My Brothers stands him back up once a mission, and its third rank makes that first knockdown cost no injury. On Hard and Expert the bacta tank is disabled, so that rank is the cheapest medbay visit there is.
Unstoppable at rank three hands back two counter shots at +2 damage, so the enemies he taunts pay for shooting him. Conditioning is +12 health at rank three. Soldier as the second specialization is there for Brutal Strike, a 1 AP rush that Dazes the target, and a Dazed unit cannot attack at all.
A turn
Bulwark if there is Advantage for it, otherwise shoot the most dangerous enemy so the hit taunts it. Unstoppable with the spare point. Brutal Strike whatever is left when one enemy needs shutting up. The repeater spends all three points in one burst; a blaster pistol trades that for three separate 1 AP shots, each of which taunts.
Assault as the second specialization gives Bull Rush and Sweeping Salvo instead, a 4 Advantage cone that damages and Disorients everything in it.
Taunts all enemies in the target area, forcing them to attack this Operator. Also increases Defense by +2 for the rest of this turn.4 Advantage, 1 per turn
Once per mission, when Trick is Downed, he automatically revives at the beginning of the next turn at Full Health. Trick does not receive an Injury the first time he is Downed.
Armory
AmplifierBarrelIncreases Blaster Damage by +1 when firing this blaster at Close Range.
Incendiary ModulatorCellInflicts 1 stack Stack of Burning when this blaster hits.
Targeting ScopeScopeReduces the Chance-To-Hit penalty provided by an enemy's Cover by 10%.
Balancing StabilizerStockIncreases Defense by +1 after attacking with this blaster. This bonus expires at the end of the turn and has a maximum.
Medpacutility, 1 APHeals 30% of the target ally's Health. Cannot be used on Droids.
Thermal Imploderutility, 1 APThrow a powerful explosive Grenade that deals excellent damage.
Repulsor Units Mk. IIutilityIncreases Movement by +1.0m. This bonus affects all of the Operator's moves.
Medic first, because the sixth rank of Combat Stim is the best single line in the game: Strong Stimulant on an ally for the rest of the combat, +3 damage and +12 max health, for 1 AP. Medic has to be the first specialization to reach it, since the second-slot ladder stops at rank five. The 23 focus it costs is almost the whole ceiling, and that is the point: stim the squad on turn one, every fight.
Scoundrel second for Identify Weakness, 1 AP to make an enemy Vulnerable so the next attack on it is a critical hit. First Responder means Hawks carries a Medpac in no slot at all, and Fearless Leader adds Assist damage to every operator just by Hawks being present.
A turn
Combat Stim the two operators who will take fire, Identify Weakness on the elite, then Call for Backup for the operator with the biggest gun.
The recon Hawks below is the other way to run him, and Scout as the second specialization is a middle road: The Spotter on his own shots and Combat Recon for the squad.
Combat Recon is 1 AP for one Advantage per enemy in the area, once a turn, and the area grows with rank. That is a squad's worth of Special Actions paid for without firing a shot: Trick's Bulwark, Cly's darts and Surge, an astromech's Coordinated Support. Tactical Timing at rank three is a 60% chance of another point on each of his own kills, and Ambush spends the whole pool on one shot when nobody else needs it.
Medic second keeps a Combat Stim rank in the kit, three turns of Stimulant at rank two, so the opening still has a buff in it. The Spotter marks whatever his blaster damages, which removes range and smoke penalties for everyone who shoots it next.
A turn
Recon the biggest cluster, spend one shot on whatever the squad is about to focus so it is Spotted, and hold the rest of the AP for Overwatch.
When Hawks is present, increases Assist Damage by +1 and Defense by +1 for all Operators.
Armory
Rapid CyclerBarrelProvides a 6% chance to restore an AP after attacking with this blaster.
Ion ModulatorCellIncreases Blaster Damage against Droids by +1 and against Ray Shields.
Long Range ScopeScopeReduces Chance-To-Hit penalties from Range by 5%.
Ergonomic StabilizerStockIncreases Blaster Damage by +1 after attacking with this blaster. This bonus expires at the end of the turn and has a maximum.
Droid Popperutility, 1 APThrow a powerful pulse Grenade that can Daze targets and severely weakens Ray Shields. Does not damage Organic targets.
Smoke Bombutility, 1 APThrow a Grenade that creates a lasting Smoke Cloud. Units standing inside the cloud receive 2 Stacks of Smoke.
Targeting VisorutilityIncreases this Operator's Chance to Hit by +5% and Critical Chance by +6%.
A blaster pistol fires for 1 AP without limit, and every Gunslinger starts with Onslaught, +1 blaster damage for each attack made in the turn. Quick Draw is a 1 AP sidearm shot on top of that, and Keen Eye at rank three is +12% critical chance on every ranged attack. So the loop is: shoot the weakest enemy first, let the damage climb, and put the last shot into the one that matters.
Scout second for the fuel and the accuracy. The Spotter marks anything the pistol damages, which strips range and smoke penalties from the follow-ups; Tactical Timing turns kills into Advantage; Open Fire spends that Advantage on two more shots without touching AP, and Ambush on one big one. A recruit can be built for this at Recruitment on day one.
A turn
Quick Draw the enemy with the least health, again if it fell, then Open Fire or the pistol into the elite once Onslaught has stacked.
The mods are the action economy: a Cycler is a chance to refund the AP after each shot, the Ergonomic adds damage after the first attack, the Capacitor adds damage on the opening turn, and the Auto-Scope negates cover.
Her whole kit runs on Advantage, not AP. ElectroWeb Dart Shocks a target for 2 Advantage (1 at rank six) and halves its movement; ElectroWeb Surge is 4 Advantage for a blast around Cly and around every darted enemy, and those blasts ignore Defense. Combat Jump moves her for 2 Advantage and pushes enemies at the landing. None of it spends an action point, so the three AP are still there for the pistol or a Scattergun.
Scout second is the fuel: Combat Recon returns one Advantage per enemy scanned for 1 AP, and Tactical Timing adds a chance of another on each kill. Ruthless is +4 critical damage at rank three, for the pistol shots that follow. Gunslinger instead gives Quick Draw and Keen Eye if the squad already has a Scout feeding her.
A turn
Dart two or three enemies, jump into the middle if they are spread, Surge, then spend the AP on a Scattergun into the cluster.
Jump to a target location, Pushing nearby enemies out of position.2 Advantage
Armory
Spiral CondenserBarrelIncreases Critical Hit Damage by +4 when firing this blaster.
Ion ModulatorCellIncreases Blaster Damage against Droids by +1 and against Ray Shields.
Assassin's ScopeScopeIncreases Critical Chance by +12% when attacking with this blaster.
Ergonomic StabilizerStockIncreases Blaster Damage by +1 after attacking with this blaster. This bonus expires at the end of the turn and has a maximum.
Scattergun Mk. IIutility, 2 APFire a short range, wide-angled blast that damages everything in the target area.
Medpacutility, 1 APHeals 30% of the target ally's Health. Cannot be used on Droids.
Thermal Imploderutility, 1 APThrow a powerful explosive Grenade that deals excellent damage.
Final Shot is her talent: once a turn, when an ally's attack leaves an enemy at 8 health or less (rank three), Jae fires and kills it, no AP spent. Rank four raises that to 10 health and twice a turn, but it costs 21 of the 24 focus on its own, so three is the stop. Zero In at rank three is 1 AP for five stacks of Lethal, +25% to hit and +15% critical chance until she moves; Pick Them Off adds to Overwatch hit chance and damage; Sharpshooter Training is +10% to hit on everything.
Scout second so each Final Shot kill has a chance to return Advantage through Tactical Timing. A longarm is a Slow weapon, 2 AP a shot, but its critical damage is double a rifle's and Overwatch fires one shot per AP invested, so she sets up, zeroes in, and covers the lane. The RSKF-44 in a utility slot is the sidearm for when two points is too many.
A turn
Zero In, Overwatch the approach with what is left, and let Final Shot clean up after the others.
Luco runs the same tree with Combat Gas in place of Final Shot: 2 Advantage for stacks that each add +5% to hit and +1 damage.
Combat Gas is Luco's talent and the reason he is built differently to Jae on the same tree. At rank three it is five stacks of Sharpened Senses, each +5% chance-to-hit and +1 ranged damage, and a stack burns per ranged attack rather than per turn. A longarm shot is 2 of the 3 action points, so one gassing covers about five turns of shooting. Rank three is 7 focus of the 24 and rank four is 16, two thirds of the budget for a sixth stack, so three is the stop.
Zero In at rank three is +25% chance-to-hit and +15% critical chance until he moves, and it stacks with the gas. Pick Them Off at rank three puts +15% and +4 damage on every Overwatch shot, which is where a longarm's spare point goes on the turns it does not reposition. Precision Shot stays at rank one: it fires once a turn for six Advantage, so the focus does more on the two lines that improve every shot.
Scout second because the squad shares one Advantage pool and Precision Shot costs six of it. Tactical Timing at rank two returns a point on 40% of kills, which is the difference between one ultimate a fight and two. Ambush and Combat Recon stay at rank one; they are there to feed the pool, not to do damage a sniper is already doing better.
A turn
Gas once at the start of a fight, Zero In, then fire and hold. On the turns he does not move, one shot and Overwatch with the point left over.
Jae runs the same three lines with Final Shot in place of Combat Gas: hers kills off other people's damage, his makes his own shots land.
Gain 5 stacks of Sharpened Senses. Each stack increases Chance-To-Hit by 5% and Ranged Attack Damage by +1. One stack expires after each Ranged Attack.2 Advantage, 1 per combat
Armory
Dual Coil CondenserBarrelIncreases Critical Hit Damage by +3 when firing this blaster.
High-Energy CapacitorCellIncreases Blaster Damage by +2 when attacking with this blaster during the first turn of each combat.
Sniper's ScopeScopeIncreases Critical Chance by +9% when attacking with this blaster.
Advanced Balancing StabilizerStockIncreases Defense by +2 after attacking with this blaster. This bonus expires at the end of the turn and has a maximum.
Targeting VisorutilityIncreases this Operator's Chance to Hit by +5% and Critical Chance by +6%.
Uppercut is Kabb's talent, a 1 AP rush and punch that pushes the target backwards, and a push next to a drop is a kill regardless of health. Assault gives Fleet of Foot, +2.0m on the first move at rank three, and Sweeping Salvo, 4 Advantage for a cone that damages and Disorients everyone in it (a -20% chance-to-hit penalty on their ranged attacks). Strike The Flanks, the Assault starting passive, is +20% critical chance against Exposed enemies, and a pushed enemy is usually out of its cover.
Soldier second is Strength, +3 melee damage at rank two, which every punch uses, and Brutal Strike, a second 1 AP rush that Dazes. Armsmaster, the Soldier passive, adds +2 blaster and grenade damage on top.
A turn
Move with the first point, Uppercut, and use what is left on Brutal Strike or a rifle shot at close range. Sweeping Salvo when three or more are lined up.
Rush an enemy and strike it, dealing Melee Damage and Pushing it backwards.1 AP, 1 per turn
Armory
AmplifierBarrelIncreases Blaster Damage by +1 when firing this blaster at Close Range.
High-Energy CapacitorCellIncreases Blaster Damage by +2 when attacking with this blaster during the first turn of each combat.
Targeting ScopeScopeReduces the Chance-To-Hit penalty provided by an enemy's Cover by 10%.
Ergonomic StabilizerStockIncreases Blaster Damage by +1 after attacking with this blaster. This bonus expires at the end of the turn and has a maximum.
Concussion Grenade Mk. IIutility, 1 APThrow a Grenade that emits a concussive blast. Deals Impact Damage and Pushes enemies.
Medpacutility, 1 APHeals 30% of the target ally's Health. Cannot be used on Droids.
Repulsor Units Mk. IIutilityIncreases Movement by +1.0m. This bonus affects all of the Operator's moves.
Pull is 1 AP, drags an enemy to her and deals Force damage. It moves a droideka out of its shield and into the squad's Overwatch, and it moves anything off a ledge. Push is the same for 1 AP in the other direction, and Shockwave pushes everything nearby for 6 Advantage. Padawan Training at rank four opens a second Meditation slot (rank five a third), which is where the build lives: Fast Healing is 8 health at the start of each turn, Bonded to the Blade lets Lightsaber Strike be used twice a turn, and Attuned to All Things adds Harmony on every Push and Pull.
Strong with the Force at rank three starts each turn with four stacks of Harmony, which raise Deflection and lightsaber damage. Lightsaber Throw costs 10 Advantage, two of Cly's Surges, so it stays at rank one. Her specializations are fixed; the choice is the ranks and the meditations.
A turn
Pull the shielded or the exposed enemy into the lane, Lightsaber Strike, and Noble Stance with what is left if she is standing in the open.
An astromech cannot fire a blaster and cannot be healed, and it is still the best support slot in the game. Built-In Comlink at rank two gives an ally +1 AP for 1 AP once a turn; rank three drops the once-a-turn limit, so all three of its points can go to one operator, at 21 focus. Enhanced Scanners is 1 AP to Scan an area: every enemy in it loses 4 Defense and is 20% easier to hit, and rank six adds a chance of Vulnerable. Coordinated Support at rank three is +1 AP to every operator for 8 Advantage, once a combat; rank six is +2 AP for 6.
Extended Storage adds a use to every limited utility item, and Storage Optimization stacks with it at rank nine, so the droid is the grenadier. Telemetry is +5% to hit for the whole team for being there. Deep Target Scan Scans, Spots and strips Evasion from one target for 1 AP. Recruiting a droid needs the Droid Repair Bay upgrade, unlocked by talking to the astromech in the Pit.
A turn
Scan the cluster, Comlink the operator with the best target, throw the grenade, and hold Coordinated Support for the turn the squad needs a second turn.
Thermal Imploderutility, 1 APThrow a powerful explosive Grenade that deals excellent damage.
Medpac Mk. IIIutility, 1 APHeals 30% of the target ally's Health. Cannot be used on Droids.
Gas Dispenser Mk. IIutility, 2 APSprays a stream of gas that Dazes all units in the targeted area.
Squads
Four seats, the builds above in them. Each opens in the squad builder with the specializations set, where the bonds between the four and every mission they can deploy on are read off.
Hawks stims Trick and Cly on turn one, Trick draws the fire, Cly darts and surges the cluster, and Jae's Final Shot ends anything the Surge left low while her Overwatch covers the approach.
Hawks' Combat Recon pays for Trick's Bulwark every turn, Kabb pushes what is left into Jae's lane, and each kill returns Advantage through two Tactical Timings.
Tel-Rea pulls shielded droids into Overwatch, the gunslinger recruit chains the weak ones, Trick holds the line, and Hawks marks the elite for a guaranteed critical hit.